Making Peanut Butter From Scratch: A Simple Recipe
Turn your hand to this simple, yet oh-so-satisfying recipe, and enjoy the flavours of peanut butter made from scratch.
Peanut butter would have to be one of the most under-rated spreads. It is antioxidant rich and packed full of protein, good fats, and vitamins and minerals. Not only that, but it can also be made at home with very little ingredients.
Benefits of making your own peanut butter
The biggest benefit of making peanut butter from scratch is that you control the ingredients. Use the peanuts on their own, or add some salt, sweetener (eg. honey, maple syrup), cocoa, or mix with other nuts.
You also control the crunch factor associated with the peanut butter. If crunchy peanut butter is desired, crush some peanuts, set them aside, and add them into the smooth peanut butter at the end of processing.
I believe homemade peanut butter is tastier. The fresher the peanuts, the better the taste. Roasting the peanuts prior to grinding also draws out the flavour.
It CAN BE cheaper. I’ll be honest, I say CAN BE because it really depends on how you buy the peanuts and their quality. I preferably like to buy things in bulk, which does work out cheaper. Although, I will happily pay a little more money for something that tastes better anyway.
How to Remove the Skin from Peanuts
Surprisingly the skin from peanuts is rich in antioxidants and seems to increase when roasted. In saying this, I would still remove the skins when making peanut butter. If left on the skins can make the peanut butter quite bitter and gives it a texture that I don’t particularly like.
Removing the skin is relatively easy and can be done via two methods: on the stove or in the oven. I find if making a smaller batch of peanut butter it is easier to roast them on the stove. However if making a few jars, for time sake it seems to be less fiddly in the oven.
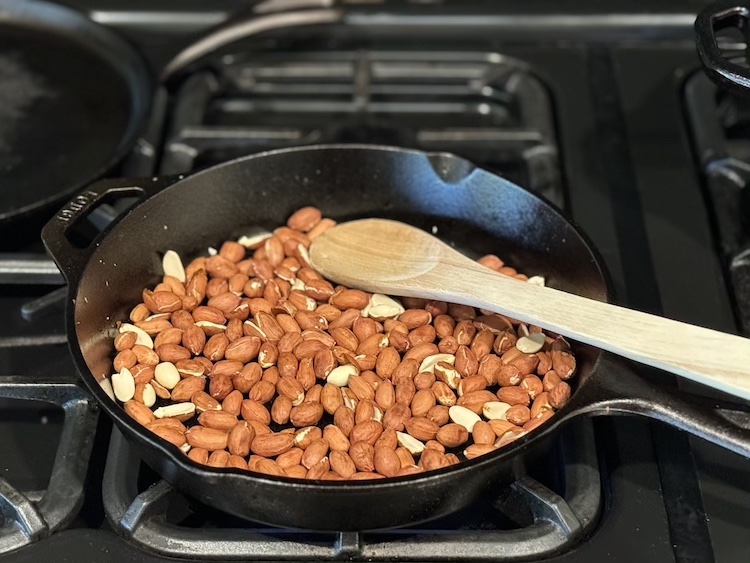
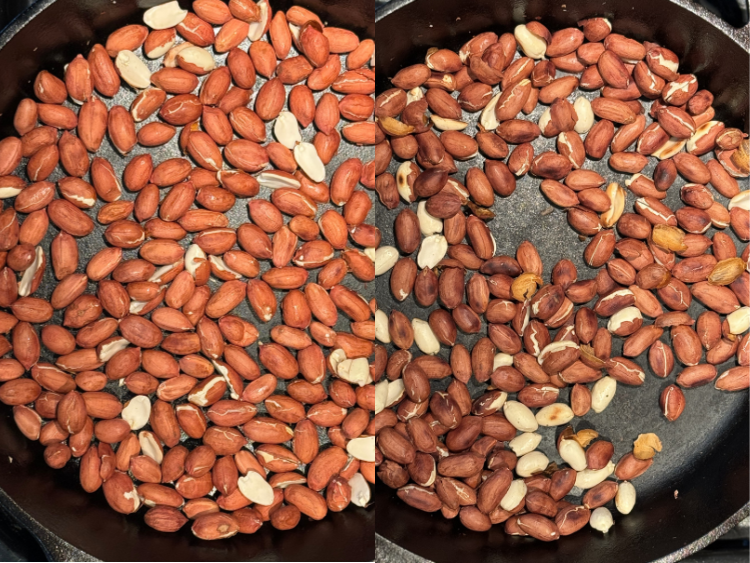
On the stove: Heat a skillet or sided pan on medium-low heat. Place the peanuts in the heated pan and stir occasionally until the peanuts are slightly browned. Once ready the peanuts give off a lovely roasted aroma and the skins will begin to peel. Remove the peanuts immediately from the pan and place on a tea towel to cool. If left too long in the pan they will burn.
In the oven: Preheat the oven to 180oC. Place the peanuts on a rimmed baking tray and roast for about 5 minutes, stirring occasionally to ensure they roast evenly. Once they have browned a little and the skins are starting to peel, remove them from the oven and let them cool on a tea towel.
Once cool, the skins can be removed by rubbing them between your hands or with a tea towel.
Roasting peanuts
The first step in making peanut butter should be to roast the peanuts. This is an important step to help bring out the flavour and oil of the peanuts. Peanuts can be roasted with the skin still on, as mentioned above, or with the skin already removed. It is much easier to buy the peanuts with the skin already removed.
On the stove: Roast the peanuts in a pan/skillet on medium-low heat until slightly browned.
In the oven: Roast the peanuts in a 180oC oven on a rimmed baking tray for approximately 5 minutes.
Once roasted the peanuts should be slightly browned. Do not burn the peanuts, as this will affect the flavour of the peanut butter.
If you are time poor you can buy peanuts already roasted. However roasting them close to processing helps to draw out the oil and I believe it gives the peanut butter a nicer flavour as well.
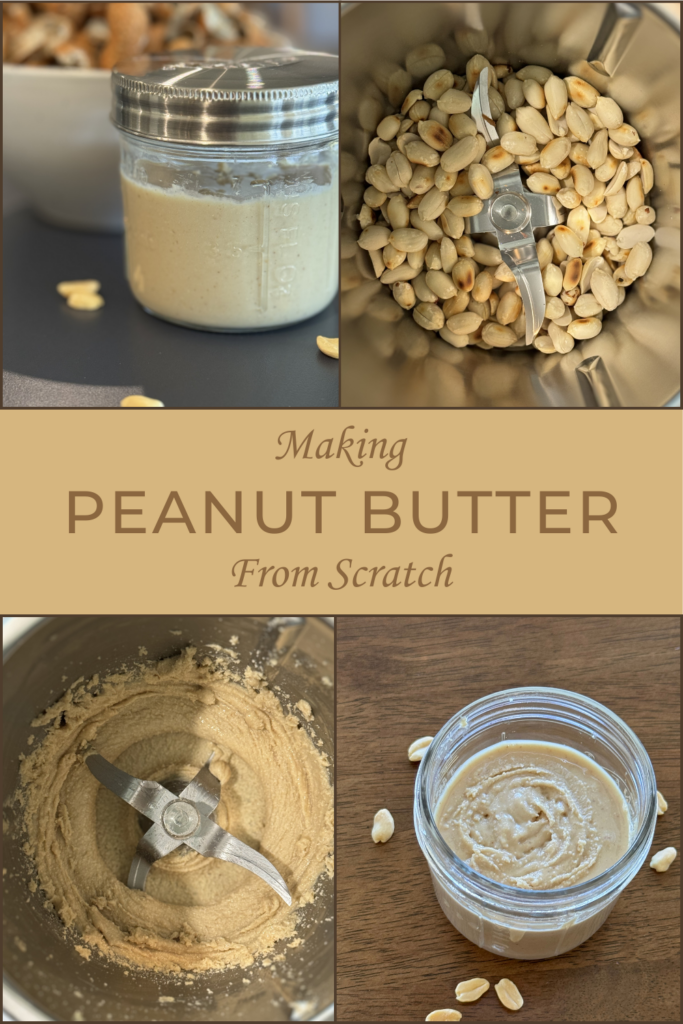
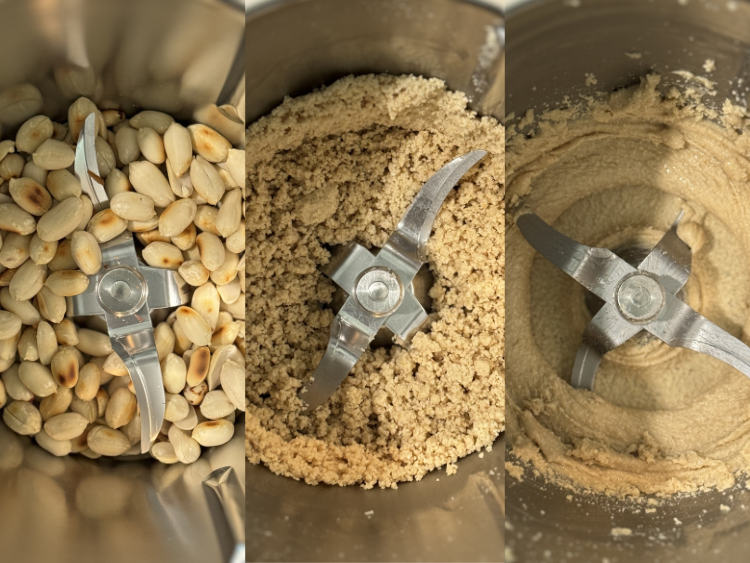
How to make peanut butter
After the peanuts are roasted, place them in a food processor, heavy-duty blender or thermomix. Process the peanuts until smooth, stopping every 15-30 seconds to scrape the sides of the bowl. Making peanut butter can be quite taxing on the motor of your appliance, so be sure to stop allowing it to cool down if necessary.
It should only take a few minutes to get a nice smooth consistency, depending on the appliance you are using.
If desired blend in other ingredients, such as salt, sweeteners (eg. maple syrup, honey, etc), cocoa, etc. If the peanut butter is dry add a small amount (approx. 1 tablespoon) of neutral oil, like vegetable oil or peanut oil.
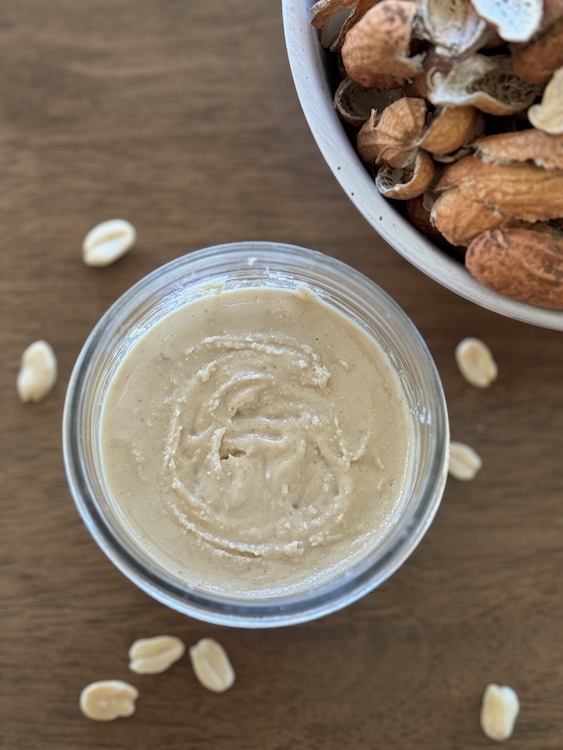
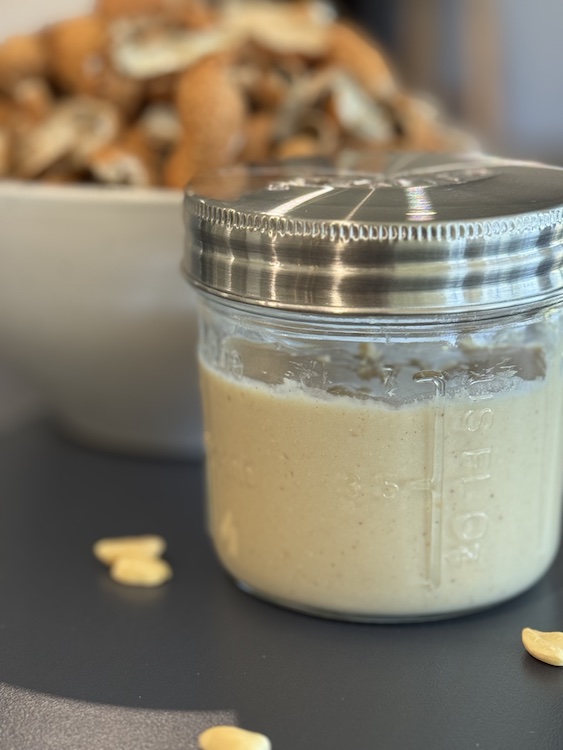
Place the delicious, creamy peanut butter into an airtight container or jar and ENJOY!
NOTE. If using a Thermomix process on speed 8.
Storing peanut butter made from scratch
Once made, the peanut butter can be stored in the fridge for a month or so. It can also be kept in the pantry if placed in an airtight container. If refrigerated it will last longer.
Uses for peanut butter
This peanut butter is that good it can be enjoyed by the spoonful. I just love it smothered on a piece of toasted sourdough with a drizzle of honey. There are also many other ways to enjoy peanut butter. Here are a few ideas:
- Bind Protein Balls or Nut Bars,
- Mix into Smoothies or Milkshakes,
- Try your hand at some Peanut Butter Cookies,
- Make some ice-cream or ice-blocks,
- Mix with other ingredients to make satay dressing or sauce,
- or just add as topper to your breakfasts – eg chia seed pudding, overnight oats or bircher muesli.
What are you doing with your peanut butter? Let us know below in the comments, or share it with us on our social media platforms.
Peanut Butter: A Simple Recipe

Ingredients
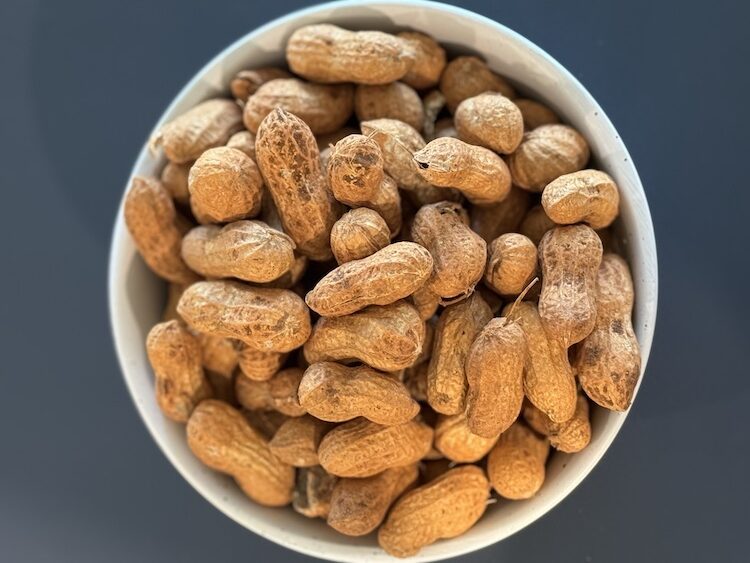
- 1 Cup Raw Peanuts skin on, unsalted, not roasted
Instructions
- Heat a skillet or sided pan on medium-low heat.
- Place the peanuts in the heated pan and stir occasionally until the peanuts are slightly brown. Once ready the peanuts give off a lovely roasted aroma and the skins will begin to peel.
- Remove the peanuts immediately from the pan and place on a tea towel to cool. If left too long in the pan they will burn.
- Once cool, remove the skins by rubbing them between your hands or with a tea towel.
- Place the skinned, roasted peanuts into a food processor, heavy-duty blender or thermomix.
- Process the peanuts stopping every 15-30 seconds to scrape the sides of the bowl until desired consistency is acheived. If using a thermomix, blend on speed 8.
- Place the delicious, creamy peanut butter into an airtight container or jar and ENJOY!
Notes
- If time poor, peeled peanuts can also be used.
- Making peanut butter can be quite taxing on the motor of appliances, so be sure to stop allowing it to cool down if necessary.
- Feel free to add salt, maple syrup, honey, cocoa or other nuts if desired.
- If the peanut butter is dry add a small amount (approx. 1 tablespoon) of neutral oil, like vegetable oil or peanut oil.
- The peanut butter will keep for a month in an airtight container in the fridge or pantry.


Amazing! This blog looks just like my old one! It’s on a totally different topic but it has
pretty much the same layout and design. Excellent choice of colors!